Learning and Creating a Hop Schedule
When I first started home brewing, I had some brew fails. I followed the recipes close enough, yet I neglected to adjust for boil off and other factors. So in addition to not getting the ABV (alcohol by volume), I was not getting the hop / bitter taste I wanted, particularly from my early IPAs. Time to do my own research. You see, just reading the recipe is not necessarily enough, sometimes you have to read more. Learn from your mistakes, possibly make new mistakes, and eventually make things better. That is the essence of science.
Between the podcasts on brewing I listen to, the abundance of community forums offering up (mostly) useful help, and some YouTube videos I watched, I got a strong sense that creating and tweaking a hop schedule is the path to the taste and flavour you are looking for in my beer.
In the Beginning
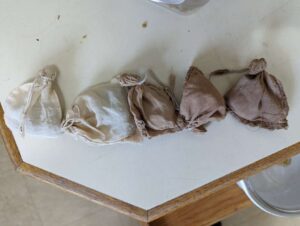
When I first started fumbling around with homebrewing, I followed the recipe as prescribed, and I just added the hops directly into the boiling wort. It is a time honoured tradition. The problem with that, lots of extra goo (that is the technical term) that became the sediment to the carboy after the first transfer. It might add extra flavour, it might just become too bitter to be enjoyable. Time to do some research. Some use some form of hop basket (or spider as the term is also known as) usually for fresh hops to contain the vegetation, but it has a similar effect for the dry hops I use. Others turned to the teetotallers, and employed a metal tea ball, or a reusable cotton tea-bag. I opted for the latter. Fair dues warning, when it comes time to clean out the bag can be a little slimy and gross. More technical terms.
Know your hops and their purpose
When I first started, I knew I wanted to brew beer in a British Isles tradition, as that is a taste I personally enjoy. I knew there was a rich tradition of growing and storing hops in England. I once stayed in a bed and breakfast in Farnham that had once served as a hop house for the nearby castle. So when I started researching some of the most popular English hops, my queries kept leading me to The Hops List. Most of what I think about hops comes from there. My most important and key take away, different hops provide different functions and flavours depending on when they get added. To simplify, some hops are best used early in the boil process to add the initial bittering. Some hops are best added late in the boil, to add the aroma. Finally some hops can serve dual function, as both early and late addition to perform bittering and aroma. Since then, my hop purchasing has usually included hops from each of the three categories. Bittering hops usually get added early in the boil, while the aroma hops get added in the latest stages to ensure you don’t boil off the smell the hop is supposed to impart.
Learn your portions and timing
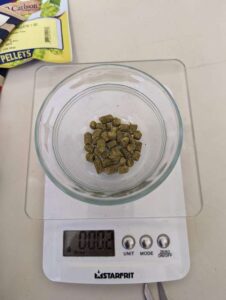
As I mentioned in my introductory paragraph, I followed a recipe, and still was disappointed. I did more reading and then the science hit me. If the time and amount of water remaining from boil off is not quite right you risk diluting the purpose of the hop addition. I had arrived at a YouTube video by David Heath, and everything just made sense. If you have the interest, I strongly encourage watching the video, To summarise the technique, on the premise it is a usual 60 minute boil. Add your bittering hops at the start of the 60 minute boil, this will ensure the predominant basis of your primary IBU then add other bittering/aroma/dual hops with 15, 10, 5 and 0 minutes remaining in the boil. In my head, I refer to this as my 5 hop system. While waiting for the wort to come up the boil, I will the reusable cotton tea-bags with the pre-measured hops, and add them at the prescribed times.
Using an online beer recipe tool (see the links at the bottom of the post), it can aid you in what the anticipated IBU (international bitterness units) should be, it will account for duration of the the hop has been in the wort for the boil, and calculate the anticipated amount of remaining wort, so you can add the right amount of hops towards the end of the boil to get the desired effect.
Use this as a really good guideline, not a rule. This hop schedule has matched what I wanted for most of my home creations since I have adopted it. For the beer I that has a much lower IBU requirement, I have simply dropped off one or more of the late hops additions, and adjusted what time to add the hops to get my preferred result.
One Last Thing?
Somewhere along the way, I learned about the Beer Judge Certification Program, and have adjusted my work to conform to their guidelines for the various styles. In this case, adjusting the amount of hops to use to be in the range of of IBUs that is generally accepted for the style I am brewing.
What about… Dry hopping? Hopstand? Still need to learn the finer points of these, produce, and reproduce in a batch.. I will do some more research…
Resources
Some of the online resources I have used for research, do calculations, to get recipes, and create my own.
- brewgr
- Brewer’s Friend
- Brew Father
- The Hops List
- David Heath Homebrew
- Master Brewers Podcast
- Good Beer Hunting Podcast
Shameless Plug
Feel free to check out my affiliate link page.
 To provide the best experiences, we use technologies like cookies to store and/or access device information. Consenting to these technologies will allow us to process data such as browsing behaviour or unique IDs on this site. Not consenting or withdrawing consent, may adversely affect certain features and functions.